HOW TO CHANNEL YOUR INNER WARRIOR YO!

BY HELEN FALIVENO
You’ll find warrior poses (asanas) in most types of yoga classes and they are often used to prepare and set you up for the next posture. When flowing through a class it can be tricky to know what is actually going on in the warrior poses, so let’s break them down. Hopefully this guide will have you channelling that inner warrior in no time!
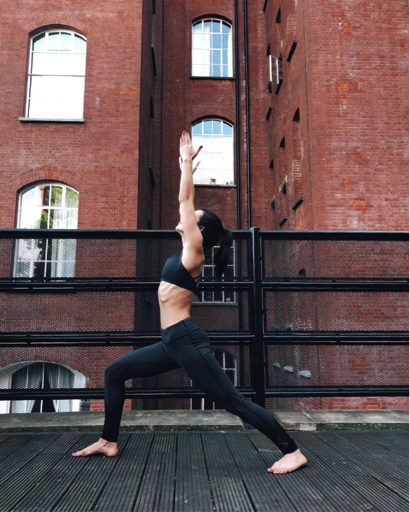
WARRIOR 1
Possibly the most tricky out of all the warriors, as it’s often mistaken for a high lunge. Let’s start at the foundations, the front foot should be facing straight forward and the back foot turned out at about a 45degree angle. Traditionally we have the front heel lined up with heel of the back foot, however we want our hips facing forward so if you need a broader stance, take it. The front knee is bent with the knee stacked over the ankle and the back leg is straight and engaged, pressing down through the outer edge of the foot helps with this.
The chest is lifted and arms are reaching for the sky, but keeping the shoulders pulled down away from the ears. Look up towards the sky and lengthen through the spine.
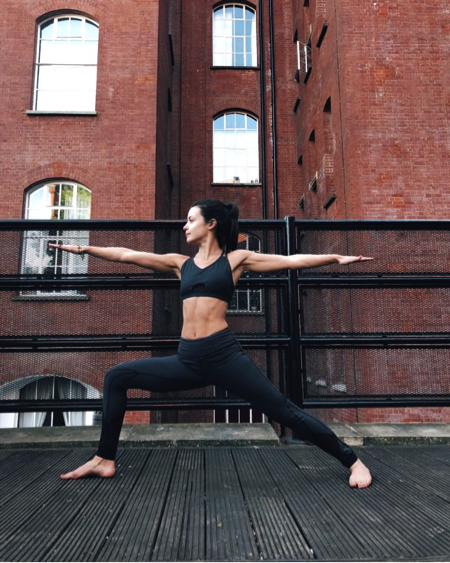
WARRIOR 2
Warrior 2 is sometimes called the fierce warrior, as this one looks like you’re ready for action. This time the hips are opening to the side, the front foot is facing forward again, but the back foot is opened out a little more, with the front heel in line with the arch of the back foot. Use the inner thigh muscles to keep the front knee stacked over the ankle and feel an opening sensation in the front hip. Don’t forget about that back leg though, press down the back foot and lift up the kneecap using the quadriceps. Shoulders are stacked over the hips; the arms are strong and stretching away from one another. Settle the eyes over the front middle finger and breathe.
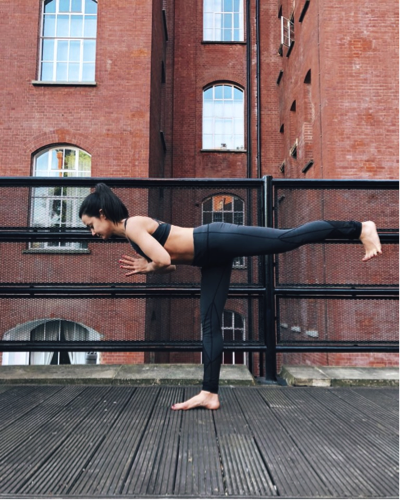
WARRIOR 3
The balancing warrior! The standing foot is rooted down through all 4 corners and the leg is strong, but with a soft bend in the knee. The lifted leg is strong with energy shooting through the heel. By flexing the back foot, the leg is easier to balance. Square the hips down to the mat, so angle the back little toe down to the floor to avoid opening up the hips and protecting the lower back. Use the core muscles here to stabilise you from the centre, the pelvic floor is lifted and the belly button is pulling back towards the spine. Try to imagine you were making a ‘T’ shape with the body, so keep the heart lifted in line with the hips. There are many arm variations for this one, so take your pick; hands at heart centre, interlaced behind the back or reaching out in front with the arms in line with the ears if you really want to fire it up!
Loving learning all things Yoga? Read some more of our Yoga posts here
Stay connected with news and updates!
Join our mailing list to receive the latest news and updates from the BoxxMethod team.
Don't worry, your information will not be shared.